This post is part of the Korean Apartment Homelab series.
Introduction
In my previous posts, I covered the hardware behind my homelab, the full list of services running on Proxmox, and my Home Assistant journey. But one topic I have only mentioned in passing is how I actually access these services from outside my apartment.
Running a homelab is satisfying, but if you can only use it while sitting on your couch, a significant part of its value disappears. Home Assistant loses most of its purpose if you cannot control your apartment while you are away. Nextcloud is just a local hard drive if you cannot reach it from your phone at work. The whole point of self-hosting is having your own infrastructure available whenever you need it, wherever you are.
This post is about how I set that up using Nginx Proxy Manager, what decisions I made along the way, and where I am headed next.
Why Not Just Use a VPN?
When you want to access your homelab from outside, there are generally two approaches: connect through a VPN, or expose your services through a reverse proxy.
A VPN creates a secure tunnel between your device and your home network. Once connected, it is as if you are physically at home. Everything on your local network becomes accessible. This is simple and secure, and it is actually what I use for some services.
My UniFi Cloud Gateway Fiber has a built-in VPN endpoint, and it has been surprisingly convenient. The UniFi app makes connecting easy, and the stability has been excellent. For services like Proxmox’s management interface or Homepage, where I do not want any public exposure at all, VPN is the right tool.
But VPN has limitations. Every time you want to access something, you have to connect to the VPN first. That extra step matters more than you might think, especially for services you check frequently throughout the day. Home Assistant is the perfect example. I want to glance at sensor readings or trigger an automation quickly, not go through a VPN connection ritual every time.
There is also the issue of sharing. If I want to give someone temporary access to Jellyfin or a shared Nextcloud folder, asking them to install and configure a VPN client is not realistic.
A reverse proxy solves both of these problems. It sits in front of your services and forwards external requests to the correct internal server based on the domain name. You access your services through a normal URL in a browser, with SSL encryption, without needing a VPN connection.
Nginx Proxy Manager makes this easy to set up and manage through a web-based GUI, which is why I chose it.
Choosing a Dynamic DNS Provider: Dynu over DuckDNS
Before you can point a domain to your home server, you need a domain. And because most residential internet connections in Korea have dynamic IP addresses that change periodically, you also need a dynamic DNS (DDNS) service that keeps your domain pointed at your current IP.
If you spend any time in Korean Home Assistant communities, DuckDNS comes up constantly. It is the default recommendation in almost every guide, and many Korean HA tutorials are built around it.
I did not go with DuckDNS.
The reason was simple: there were too many reports of instability. Posts about DuckDNS failing to update, DNS propagation delays, and intermittent downtime appeared regularly in the communities I was reading. For a service that is supposed to be the front door to your entire homelab, reliability is not optional.
Instead, I chose Dynu. It is also completely free, supports dynamic DNS updates, and allows you to create subdomains under their provided domains. The difference is that in the months I have been using it, I have not experienced a single issue. DNS updates happen quickly, and the service has been consistently available.
Dynu also supports wildcard DNS records, which turned out to be useful when I started adding more services behind Nginx Proxy Manager. Instead of creating a separate DNS entry for every service, a single wildcard record covers everything.
For anyone in Korea setting up a homelab and looking for a DDNS provider, I would recommend at least considering Dynu before defaulting to DuckDNS. The Korean community’s familiarity with DuckDNS means there are more tutorials available for it, but the actual reliability of Dynu has been noticeably better in my experience.
Setting Up Nginx Proxy Manager on Proxmox
I run Nginx Proxy Manager as an LXC container on Proxmox rather than as a Docker container or a VM. This is consistent with my general approach: LXC for lightweight services, VMs for things that need full OS isolation.
The installation itself is straightforward. There are community scripts that automate the creation of an NPM LXC container on Proxmox, and the process takes only a few minutes. Once the container is running, NPM’s web interface is accessible on port 81, and you can start configuring proxy hosts immediately.
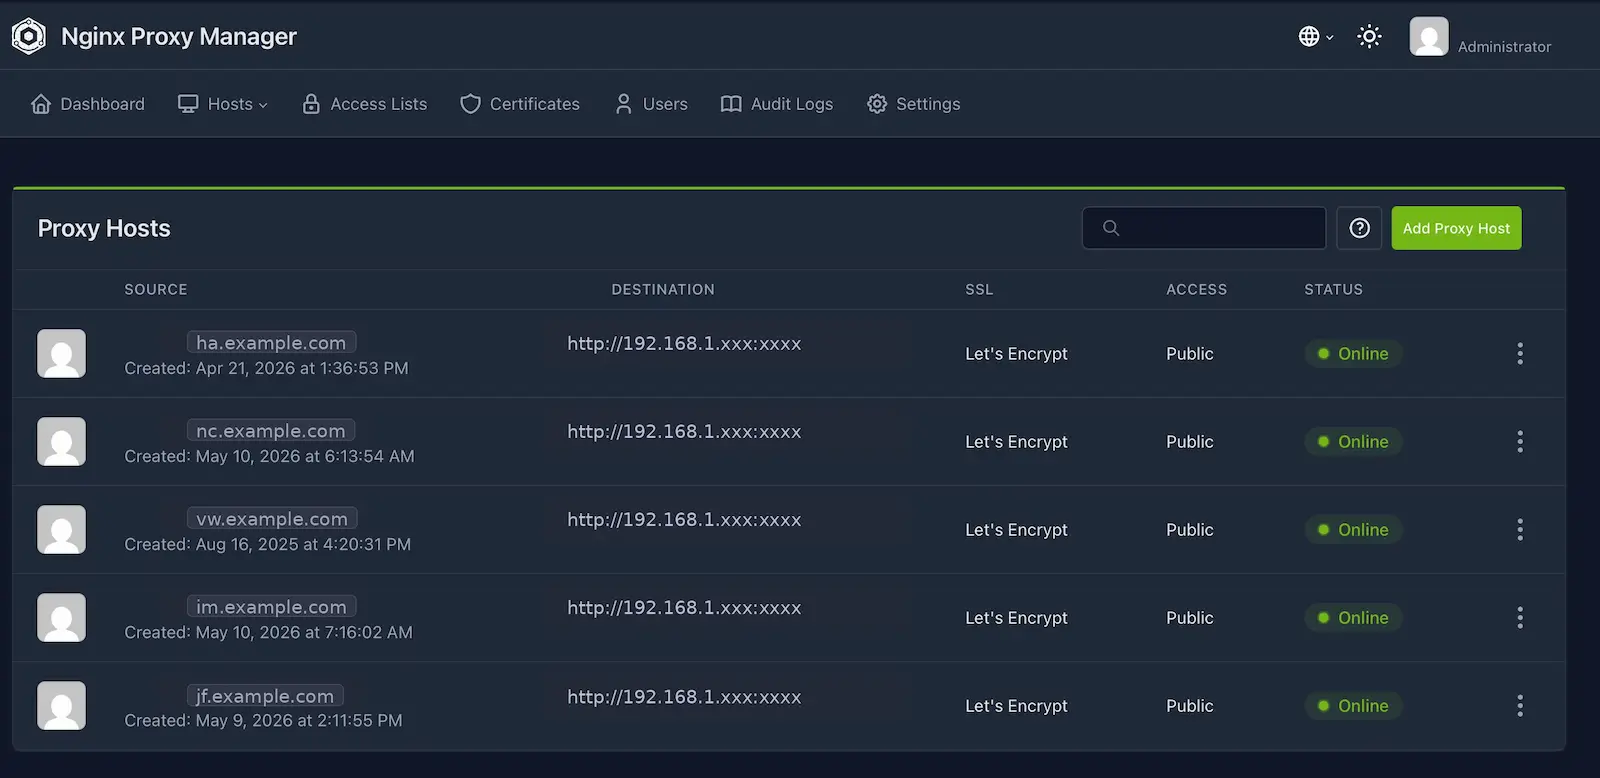
The core concept is simple. For each service you want to expose externally, you create a proxy host entry in NPM. You specify the external domain name, point it to the internal IP and port of the service, and NPM handles the routing. When a request comes in for homeassistant.yourdomain.com, NPM forwards it to the Home Assistant VM’s internal address. When a request comes in for nextcloud.yourdomain.com, it goes to Nextcloud. One entry per service, all managed through a clean web interface.
This is where the wildcard DNS record from Dynu becomes valuable. Instead of manually adding a DNS record every time I set up a new service, the wildcard ensures that any subdomain under my Dynu domain resolves to my home IP. I only need to add the proxy host entry in NPM, and the service becomes accessible.
SSL with Let’s Encrypt
One of the best features of Nginx Proxy Manager is its built-in Let’s Encrypt integration. When you create a proxy host, you can request an SSL certificate with a single toggle. NPM handles the certificate issuance, renewal, and installation automatically.
For my Dynu domain, I use DNS challenge verification rather than HTTP challenge. The DNS challenge method works better when you are behind a dynamic IP and want to issue wildcard certificates. Dynu’s API supports this, and NPM has built-in support for Dynu as a DNS provider, so the configuration is minimal.
Once configured, every service I expose through NPM is automatically served over HTTPS with a valid certificate. There is no need to manage certificates manually or worry about renewals. It just works.
This is one of those things that sounds trivial but makes a real difference in daily use. Browsers do not complain about certificate warnings, mobile apps connect without issues, and everything is encrypted without any ongoing maintenance.
What I Expose and What I Keep Behind VPN
Not every service needs to be publicly accessible, and deciding what to expose was one of the more important decisions in this setup.
Currently, the services I expose through Nginx Proxy Manager are:
- Home Assistant — This is the primary reason the entire reverse proxy setup exists. Being able to control the apartment remotely is essential.
- Nextcloud — File access and calendar sync from anywhere.
- Vaultwarden — Password manager access from all devices.
- Immich — Photo backup from my phone.
Everything else stays behind the VPN:
- Proxmox — The hypervisor management interface should never be publicly exposed.
- Homepage — As I mentioned in a previous post, a dashboard listing all your services and their internal addresses is too dangerous to make public.
- Grafana — Monitoring dashboards contain detailed information about the server infrastructure.
- AdGuard Home — DNS configuration should remain internal only.
The general rule I follow is: if a service is designed for frequent, quick access from multiple devices and locations, it goes through NPM. If it is an administrative or monitoring tool that I only need occasionally, it stays behind VPN.
The Reality of Port Forwarding
My current setup relies on port forwarding through my UniFi gateway. Ports 80 and 443 are forwarded to the Nginx Proxy Manager container, and all external traffic flows through those two ports.
This works. It has been working reliably for months. But I am not fully comfortable with it as a long-term solution.
Port forwarding means my home IP address is directly exposed. Anyone who resolves my domain can see my residential IP. While NPM and the firewall provide a layer of protection, the fundamental issue is that the attack surface includes my home router itself.
There is also a practical limitation specific to Korean internet providers. Some ISPs in Korea use Carrier-Grade NAT (CGNAT), which means your router does not actually have a public IP address. In that situation, port forwarding simply does not work. I am fortunate that my current ISP assigns a real public IP, but this is not guaranteed and could change.
For these reasons, I have been planning to move to Cloudflare Tunnel, and it is the next change I intend to make.
Next Step: Cloudflare Tunnel
Cloudflare Tunnel eliminates the need for port forwarding entirely. Instead of opening ports on your router, a lightweight daemon runs on your server and establishes an outbound connection to Cloudflare’s network. External traffic reaches your services through Cloudflare without ever touching your router’s public IP directly.
The benefits are significant:
- No ports need to be opened on the router. The attack surface shrinks dramatically.
- Your home IP address is hidden behind Cloudflare’s network.
- It works even behind CGNAT, since the tunnel is an outbound connection.
- Cloudflare provides additional security features like DDoS protection and access policies.
I have not implemented this yet, but I have been preparing for it. The plan is to migrate the existing NPM setup to work behind Cloudflare Tunnel, which should allow me to keep the same proxy host configuration while removing the port forwarding rules from the gateway.
When I complete that migration, it will probably become its own post. The current setup with port forwarding has served me well, but it is time to close that gap.
Lessons Learned
Setting up external access for a homelab is where self-hosting stops being a hobby and starts feeling like real infrastructure work. The moment your services are reachable from the internet, every decision about security, reliability, and maintenance becomes more consequential.
A few things I would tell someone starting this process:
Pick your DDNS provider carefully. The community default is not always the best choice. DuckDNS is popular because it appears in every tutorial, but popularity does not equal reliability. Test alternatives like Dynu before committing.
Do not expose everything. It is tempting to make all of your services accessible from anywhere, but every exposed service is an additional attack surface. Be deliberate about what goes through the reverse proxy and what stays behind VPN.
Start with port forwarding, but plan for Cloudflare Tunnel. Port forwarding is the simplest way to get started and helps you understand how the traffic actually flows. But it should be a stepping stone, not a permanent solution.
Use wildcard DNS and certificates. Managing individual DNS records and certificates for each service quickly becomes tedious. A wildcard setup saves significant ongoing effort.
Looking back at the full arc from my first Home Assistant installation to a reverse proxy serving multiple services over HTTPS, it is remarkable how each step naturally led to the next. A smart home needed remote access. Remote access needed a reverse proxy. A reverse proxy needed DNS and SSL. And now DNS and SSL need a more secure tunnel.
The homelab keeps growing, one problem at a time.